
Document no: SG2024-04-17
Date: 17.04.2024
INSTRUCTIONS RELATE TO ALL SEGE SEATS FOR ADR 68/00
REVISION 17.04.2024
The Sege seats have been tested and approved to comply with ADR68, Appendices 1 and 2, and issued with Component Type Approval by the Road Vehicle Regulator (ROVER). Provided below are instructions to install the seats into the applicable vehicles. Please be aware that Sege Seats are not to be modified in any way unless approved by the manufacturer.
The seats are only to be fitted by a competent installer and Sege will not be hold responsible for any poor workmanship or mistakes performed by the installer.
It is important that the seats are installed as per the manufacturer’s instructions. Failing to follow the instructions may result in non-compliance and the manufacturer will not be held responsible for the neglect of the installers’ duty of care.
Safety and Guidance
- Ensure that the proper personal safety equipment is used.
- It is recommended that a pilot hole is drilled first to ensure correct position and adequate clearance is provided from fixtures such as wiring looms and fuel lines etc.
- Clean vehicle of any sworf to prevent damage to the floor coverings
- Seek assistance if needed for manual handling of seats.
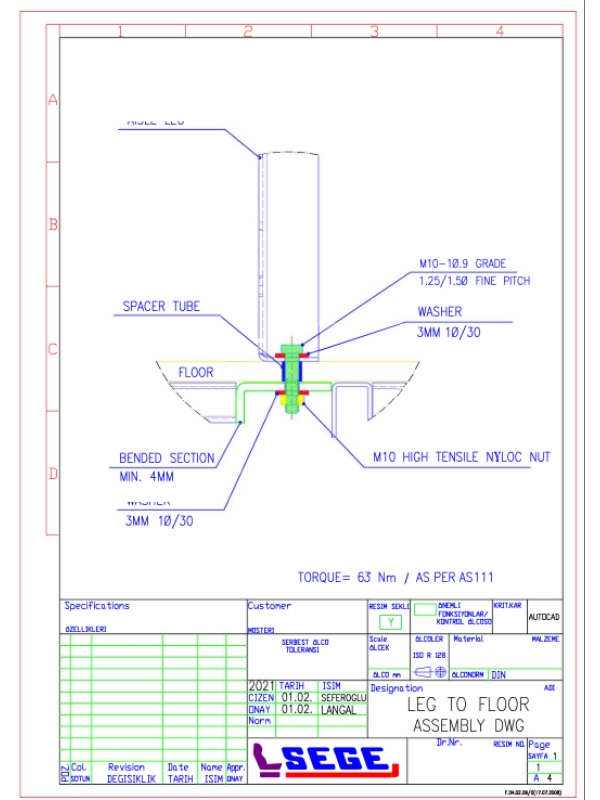
- Where mounting holes pass through hollow sections a suitable crush
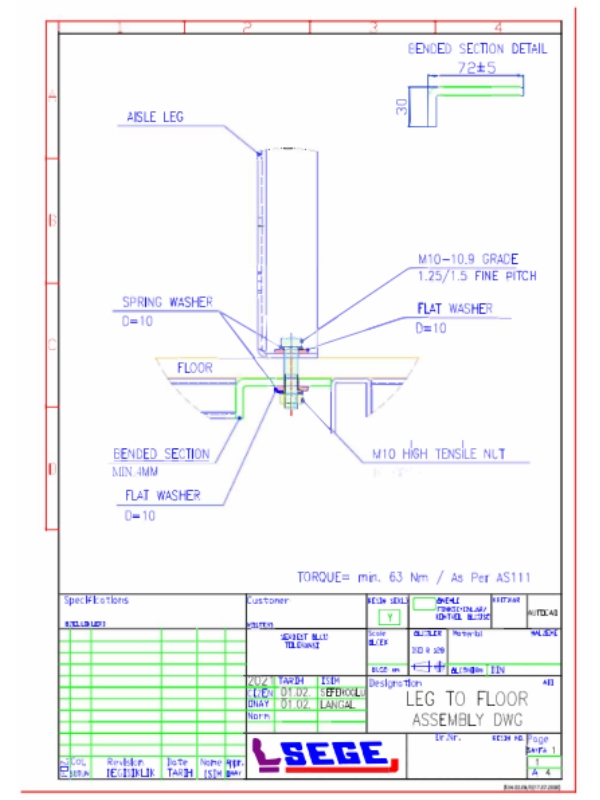
tube/spacer must be fitted to prevent crushing of the section. It is preferred that is tube/spacer is welded. However, a removable insert is acceptable if the bolt will not pull through under crash loads and a tube/spacer is used in each bolt. - Seating legs and side wall mountings must not exceed 860mm spacing. If this cannot be avoided then additional seat channel clamps must be fitted.
Fitting Instructions
- Study and understand the seat layout prior to any work being carried out.
- Position the seats as per the approved layout.
- Mark the positions of the holes to be drilled as per the mounting holes in the seat.
- Checks the locations of holes are in the correct position.
- Predrill the holes with a suitable pilot hole to ensure that the seat is installed in the correct position and not interfering with any fixtures. (Use a suitable drill depth guide if needed.)
- Drill out the pilot holes out to 10mm for legs and side walls.
Note: predrilled holes must not be any larger than 1mm of the bolt diameter. Alternatively, holes can be drilled at 8.5mm and then tapped out to suit bolts. - Installation of fasteners/bolts can be in plain or tapped holes.
- Clean filling and sworf.
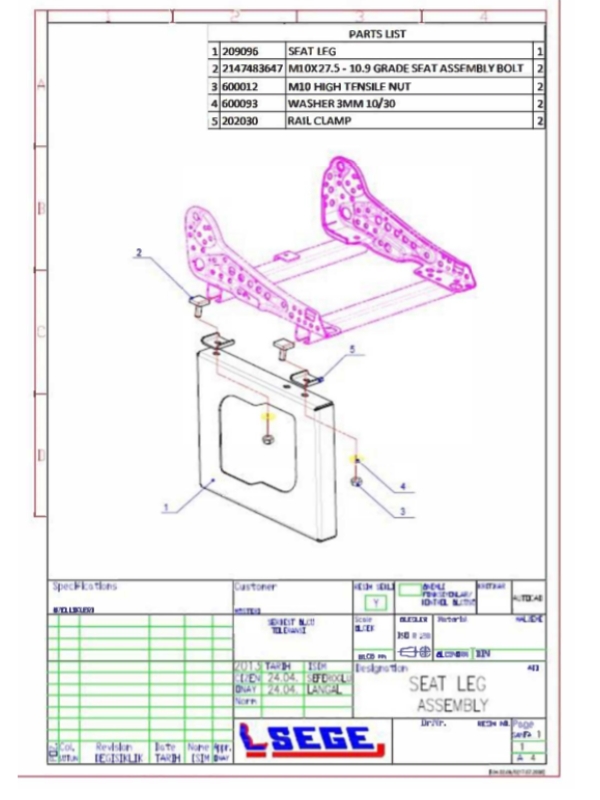
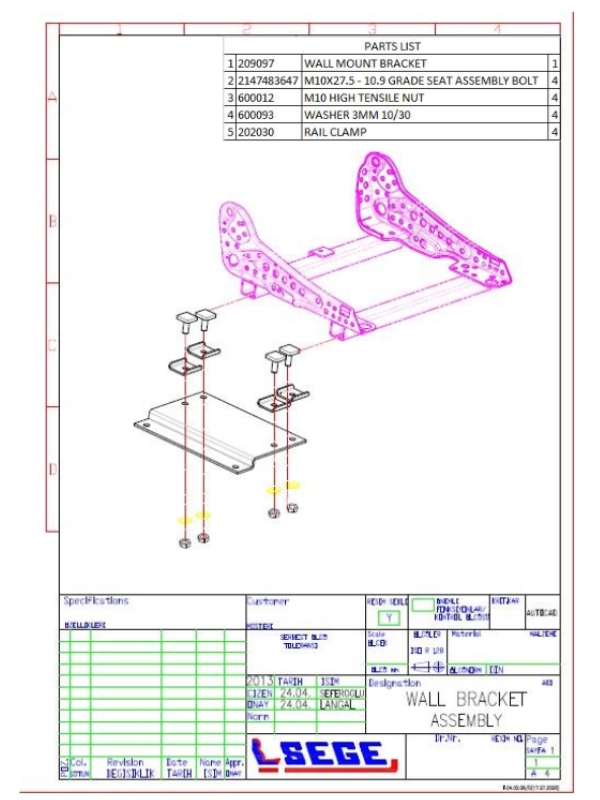
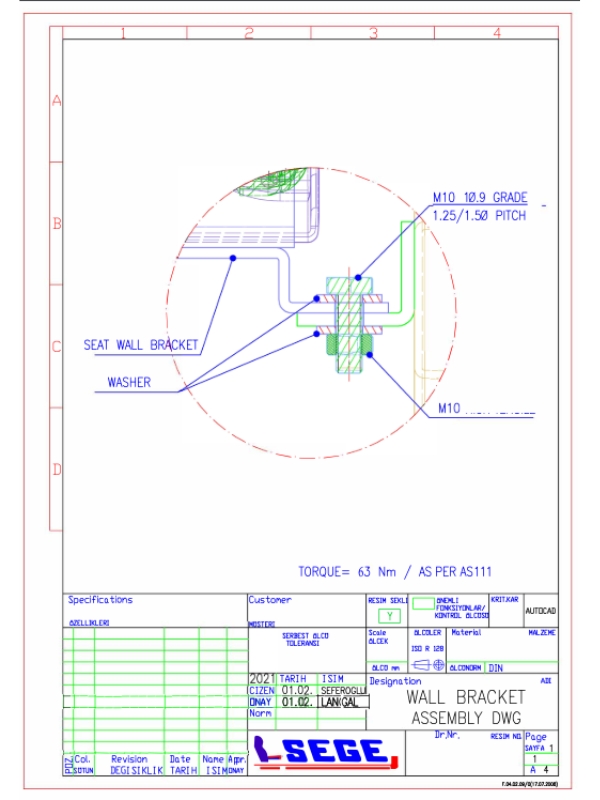
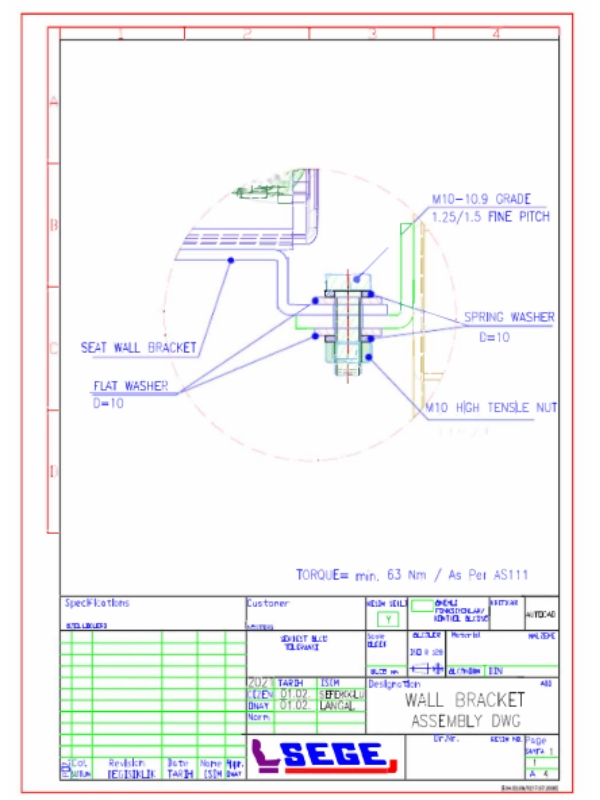
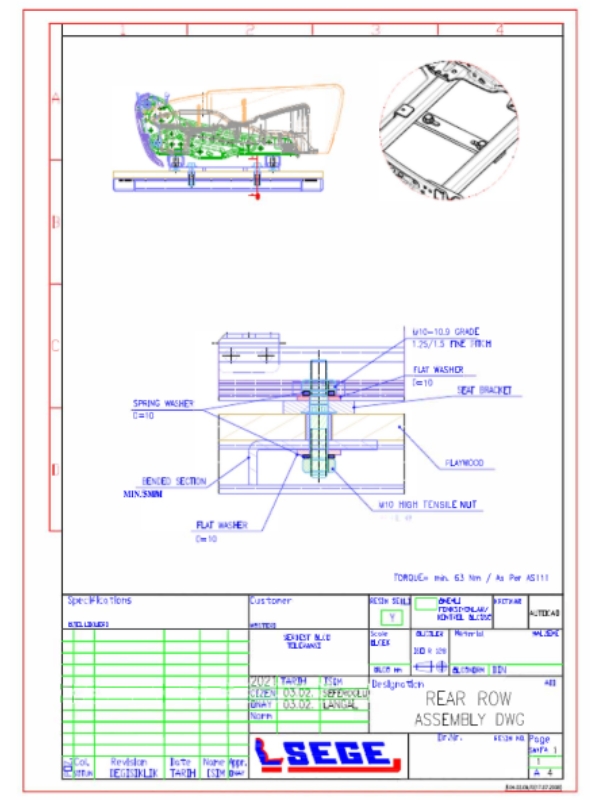
- Position and bolt seat into position using 3 of M10 x 1.50/1.25 10.9 Grade Bolts for legs and of M10 x 1.50/1.25 10.9 Grade Bolts for side wall brackets.
- Bolts are to be fitted with flat washers to top side of mountings. When fixing the underside Sege recommends one of the following options,
– Flat washer, spring washer and nut.
– Flat washer and nyloc nut.
– Hex Flange Serrated (Wizz) Lock Nuts.
– If tapped frame member with minimum thickness of 8mm then spring washer must be added to the flat washer on the top side of the mountings. It is
recommended to use thread lock
- All 10mm x 10.9 high tensile bolts and T-bolts are recommended to be torqued to 63Nm as per AS111
Sege Seats. Supplier of Quality and Comfort!
0+
Production of Seats per month
0%
Positive feedback
0+
Countries Supplied Worldwide
0%
ADR-68 Approved